Creating a One Dimensional Array
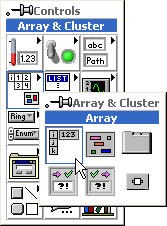
Simple arrays are created by combining an array shell with a numeric, boolean, string or cluster data object (for our discussions, all data types will be numeric). To place an empty array shell, pop up in the Front Panel > Controls > Array & Cluster > Array

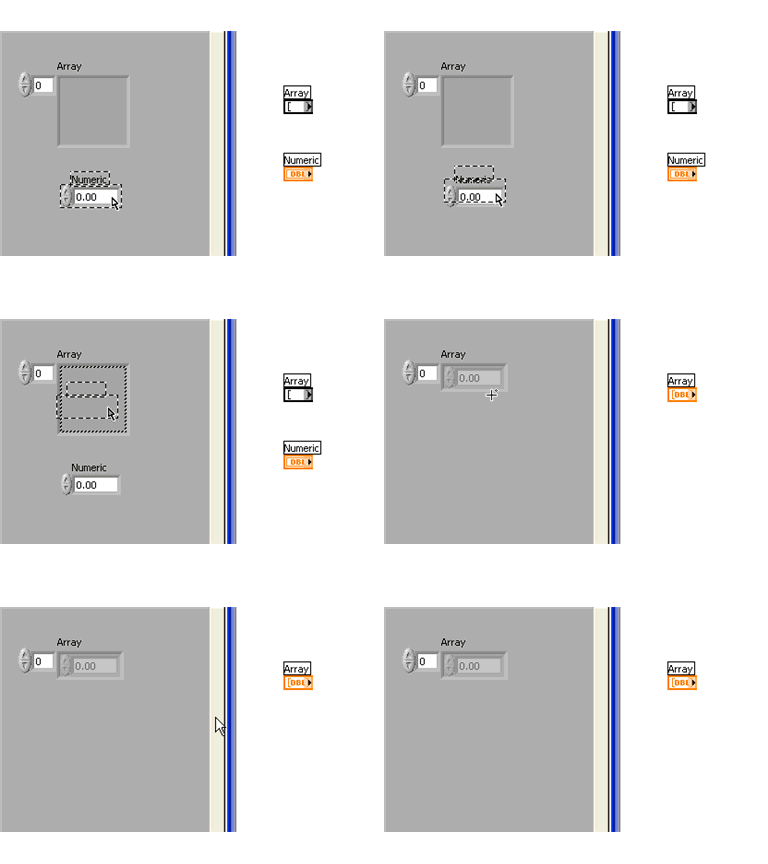
You will see the empty array shell in the Front Panel and it's terminal in the Block Diagram:
Notice that the array terminal looks empty to indicate it is still just an empty shell.
Next, drag a data object (in this case a numeric control) into the array shell. The array shell will automatically adjust to the data object's data type. You will see the array terminal change to indicate the data type of the array.

Manually Adding and Reviewing Array Content
By default you can only see the first array element. In order to see more elements of the array, select and stretch the array to the right. Make sure you get the frame corners or the one element will just stretch:

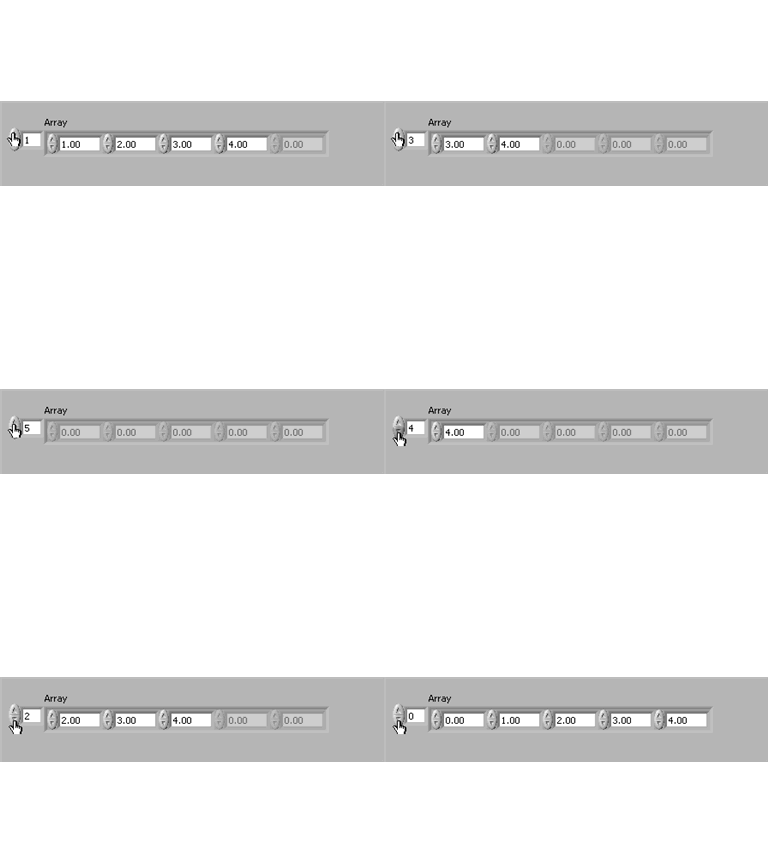
The above is showing the first five elements of this array. All the elements are empty. To manually enter data into the elements, select the elements one at a time and enter the data. In the example below, the data entered is the same value as the indices from index 0 - 4. To manually scroll through the array, click on the index display and increase/decrease its value. Notice that the current element is always on the left side of the array row:

Two Dimensional Arrays
Two-dimensional arrays require two indices: a row index and a column index. These are used like addresses to "look up" data elements in the array. Both indices are zero-based as in one-dimensional arrays. Below is a five-row, seven-column array which can hold 35 data elements.
Creating a Two Dimensional Array
You create a two-dimensional array by modifying a one-dimensional array. Pop up on the index display > Add Dimension. Then re-size the array display vertically to display the columns and manually add data as described above.

Creating One-Dimensional Arrays With a Loop
Wire Tunnels
Also notice that when a wire is brought outside a loop a Tunnel is created. In this case we want the Array Indicator outside the loop because we want the data at the end of all loop iterations.
Creating Two-Dimensional Arrays with Nested Loops
You can create nested For Loops to create a 2D array. The outer loop creates the row elements and the inner loop creates the column elements. The animated example below creates a six-column, eight-row 2D array filled with random numbers. The element display has been re-sized to show seventh column and fifth row elements. Notice that they are not filled with data and that all elements get filled at the end of the last loop iteration:

