|
|
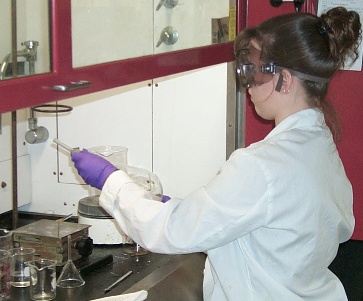
Parts of a separatory funnel:
Stopper Body Stopcock Drain Tip |
|
|
Parts of a separatory funnel:
Stopper Body Stopcock Drain Tip |
Normally, you will be starting with an organic reaction mixture in an organic solvent. Close the stopcock. Add the organic liquid through the Stopper opening at the top. Then add the aqueous solution; if you anticipate a chemical reaction (e.g., formation of CO2 from neutralization of an acid with bicarbonate) be sure to add the aqueous solution slowly.
If gas evolution occurs, slowly swirl the contents of the separatory funnel until most
of the foaming ceases. At this point, you must perform the most difficult
maneuver: Place the stopper in the opening at the top, and pick up the separatory
funnel. Hold it with one hand around the bottom of the flask with your thumb and
forefinger on the stopcock handle, and with the other hand grasping the pennyhead of the
stopper (if it has one):
In one motion, invert the separatory funnel and open the stopcock as it rises
above the surface of the liquid. You shouldhear a "whoosh" of gas
pressure escaping.
There are several challenges in this process:
At this point, you have not mixed the two layers sufficiently to get a good extraction. It is necessary to close the stopcock and shake the mixture vigorously. This will create more pressure buildup, so stop and vent periodically. Normally, three shake-and-vent cycles are sufficient for each extraction step.
Now you are ready to separate the layers. Place the separatory funnel back in the ring stand. The two layers should separate on their own; if not, or if they only partially separate, see Emulsions below. Take the stopper off, and set it on a clean paper towel. Once the last of the emulsion clears, drain the lower layer into an appropriate container (Organic liquids are kept in Erlenmeyer flasks; aqueous liquids can be stored in beakers).
| How do you know which layer is which?
You should have some clues recorded in your notebook:
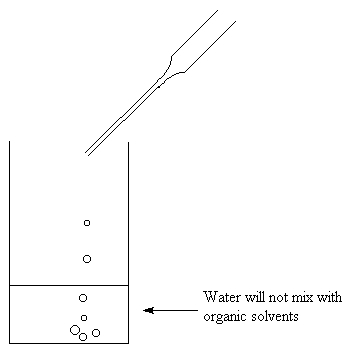
If you still aren't sure, separate the layers, and add a few drops of water to each. Water will be miscible with the aqueous layer, and immiscible with the organic layer. Be careful: chlorinated organic solvents are usually denser than water, and other organic solvents are lighter than water. However, the density of the water solution is also affected by the dissolution of salts or of organic compounds. |
 |
Drain the lower layer into an appropriate container until the meniscus just reaches the stopcock plug. Then, drain the top layer out through the stopper opening into an appropriate container. This will prevent contaminating it with excess amounts of the lower layer solution.
Sometimes, the two layers do not easily separate due to the formation of an
emulsion. (You have seen these before; milk is a suspension of fats and proteins in
water.) Often, simply leaving the mixture alone for 5-10 minutes will allow it to
separate. If this fails, try the following:
In difficult cases, a combination of techniques must be used.
by K. Gable